I have three solid reasons for needing a tote bag:
* My new Book Review blog requires frequent library trips, and a means to 'tote' all my literary finds,
* & I just HAD to have something Zebra print for when we went to the Zoo for Z-day!
So even though any spare minute spent in my unfinished basement dungeon of a sewing room has been to do my home sewing... I took a very NAUGHTY break (I am very very very behind on my sewing) to make ME a tote of MY very own! Introducing the Zebra Tote!

awwww cute!
and for the record, selfish sewing TRUMPS work sewing anyday :)

Yuck! They are still waiting for me down there...
I scoured the internet for other tutorials and struggled finding something I liked.
But then, at the last place I looked, there it was!
So I patterned my bag after hers with some additions of my own
(inner/outer pockets, & magnetic snap closure)

I started with a 20"x30" piece of main fabric
I used upholstery fabric at Hobby Lobby, It might be overkill but I didn't want to line everything with interfacing (interfacing and I do NOT get along)
It is folded in half in the above picture
Press it well making a visible crease down the middle, you will need to reference the center several times (and do it both directions - 'hotdog' and 'hamburger!')
I wanted outside pockets between my straps so without being too technical I just took what was leftover from the yard lengthwise, which since I had purchased a yard of fabric was roughly 6 inches. turned it against the grain, folded down the top an inch and stitched in place then centered it on my 'hotdog crease' 2 1/2" from the top(s)

I just did a quick stitch around the 3 remaining rough edges, nothing too fancy because the straps and bottom are going to cover it.

At this point necessity won out and I put 4 strips of interfacing to back where I was going to sew the straps down (ugggg- interfacing...)

I didn't mess with making my own straps I just bought strap by-the-yard and used 44" each side.
I wanted my straps 6" apart so it, but I measured in from the edge - turned out to be 5 3/4", with the bottom of the strap 10 1/2" from the top

Pin and sew as close to the edge as you can

Stop 1 1/2" from the top pivot and head back down
It's impossible to see the stitch marks on the front side so I took a picture from the back

You Are Welcome!
This picture alone may determine the outcome of your tote! oh and check out my sweet cross reinforcement on the bottom - yeah baby!
When you are done goggling over your fancy foot work it's time to attach the bottom
I bought 1/3 of a yard of heavy duty canvass and used the whole
1/3yd x 20"


Press down 1/4" on the long sides
also press a center 'hotdog' crease
Pin and sew at 1/8" all the way around your bottom rectangle

Which is in the center of your fabric...
you're not lost right?!?!
Fold it in half, right sides together, like a 'hamburger' and sew your sides at 1/4"
cut lining fabric 20"x30", fold like a hamburger and sew down both sides 1/2", leaving a hole on one of the sides big enough for your hand to get through.
(you want your lining slightly smaller than your bag)
I wanted boxed corners you can do this by either cutting out a 2" square from the bottom of each side directions here or by making a triangle out of your bottom, measuring 3" from bottom on the seam and sewing straight across.

I had issues getting it perfect so I think next time I am going to try it by cutting out the squares.
Anyhoo, 4 corners later - time to cut (or serge) off the corners and flip!
At which point my camera DIED.
And since this was my selfish project I didn't wait for it to charge to finish up my bag - take that blog world!
So my pockets and snaps - the only thing I really did differently from Gina, will have to go undocumented *sniff*
Right sides together, stitch around the top. Flip (through your handsized hole in you lining side-seam, and top stitch)
I'm really feeling bad now about no pictures
oh wait - I did take one cell phone pic (pre topstitch, post flip)

okay, Now you can topstitch!
stitch the opening of your lining side seam closed (I still need to do that part - got a little excited to be done)
All done!

The lining was my moms idea, she suggested red though - which would have been just as adorable

and a little sneak peak of my inner pocket and snap
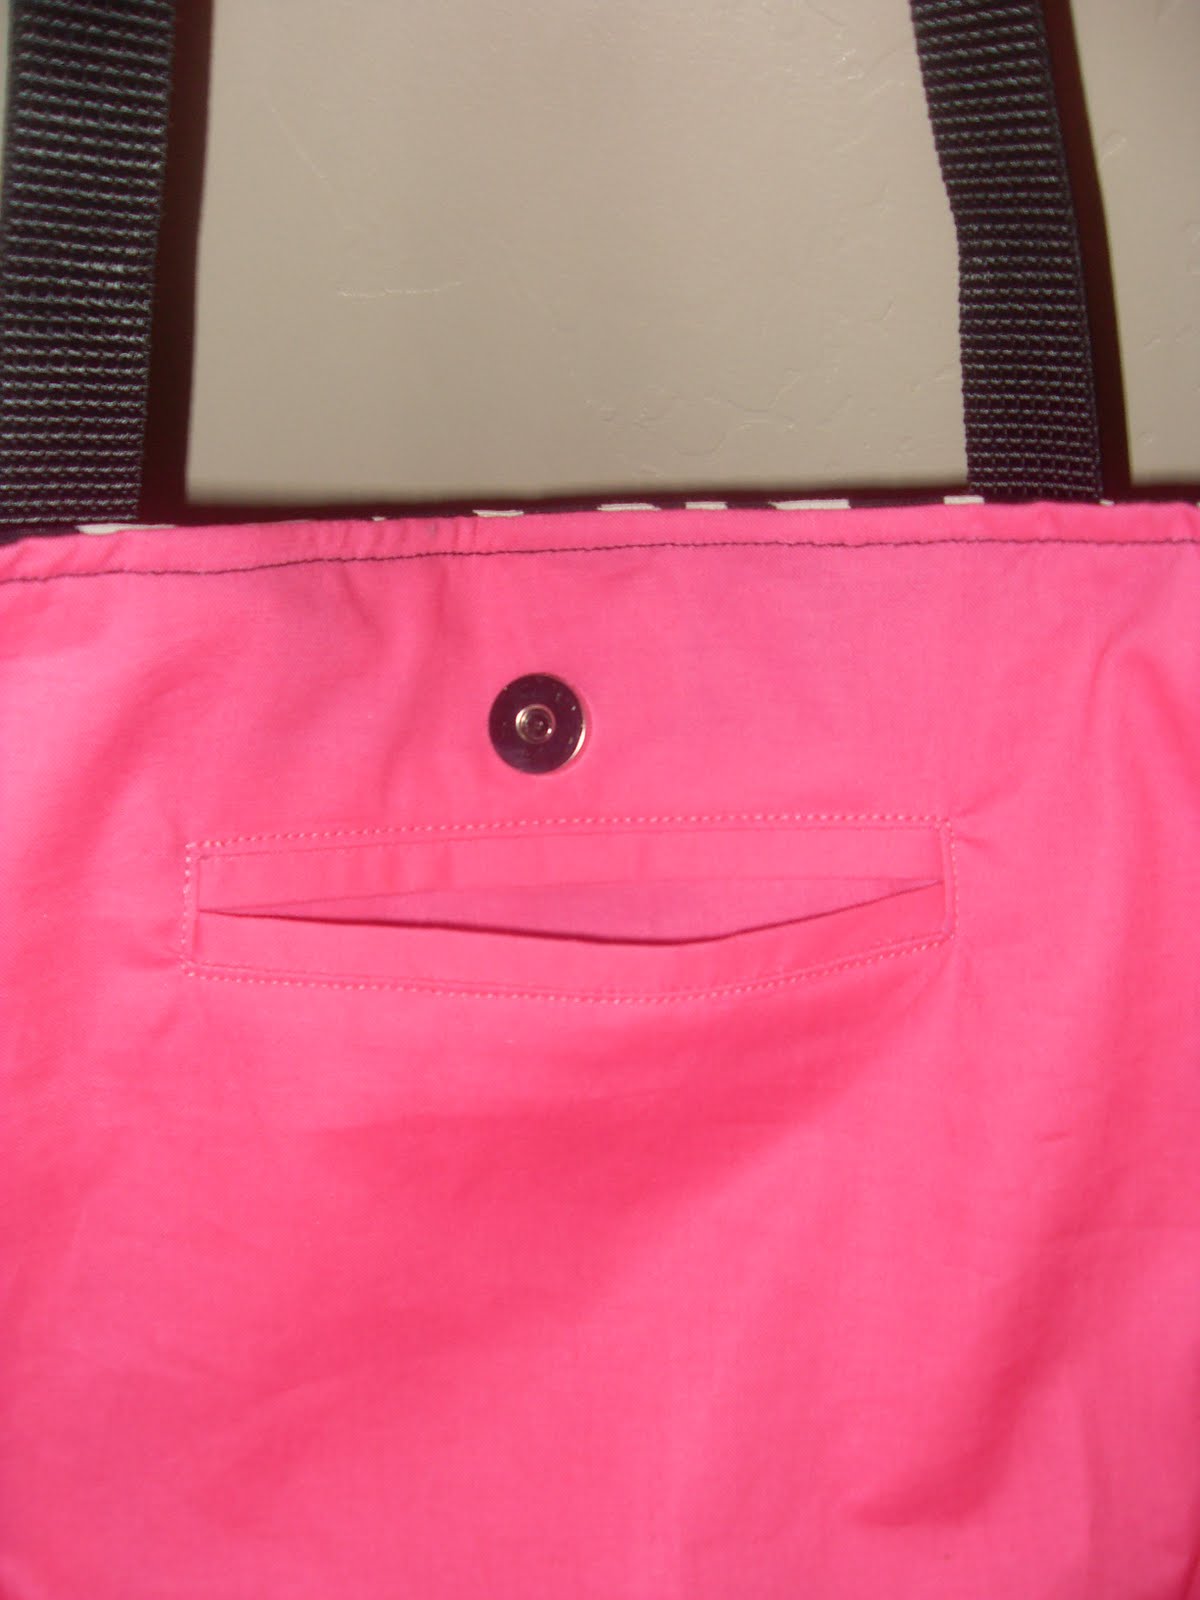
The crocheted rosette I learned to do here

super fun, my mom had to translate for me, she's great :)
I LOVE it!
There are a couple of things I'd change if I made another one but it does have me super excited to make matchy zebra print backpacks for my girls!


6 comments:
Oh my heck! You are SO creative! If you sell those, I would LOVE one for my library trips! How much would you charge? I wish I could sew...
Cute! I want one! How much would you charge if I asked you to make me one? It would make a cute church bag. :)
Talented!
I would love to make you both one!
It would be best for me if you just picked out and bought your own fabric and then I would take it from there.
1 yrd canvas for main bag
1 yrd coordinating fabric for bottom and lining (a bit more if you want your straps the same - otherwise 2.5 yds strapping)
1yd interfacing if your fabric is flimsy (just an 8" square otherwise)
magnetic strap
Erin you are amazing! I am jealous of all your fancy sewing equipment and gear. I need to get one of those measuring sticks to make things even... I don't even know what it is called, but I saw it on one of the pics.
I love the pink and zebra... red would have been nice too... but I love pink (especially the shade you chose).
Oh, and what type of stitch did you do around the pocket? Would I be able to get away with a zig-zag or something? I don't have a fancy schmancy machine... so it only does the basics.
And...er one other thing... why did you end up putting interfacing behind the straps?
You're amazing... so talented. Keep the tutorials coming. :)
thanks Liz! you might have been the only one who read through the instructions - Hope they weren't too confusing.
LOVE your questions!!!
haha, I call the plastic measuring thing a ruler...
jk you probably meant the small metal one, it's a seam gauge and really really cheap, and super useful - no reason not to have one!!!
I did the interfacing behind the straps only out of paranoia - a lot of tutorials I found lined their entire bag with interfacing and I am just too cheap for that - plus my fabric was really sturdy so I probably didn't need to even do as much as I did, but I would cry really hard if my stitching pulled through my fabric 500 library books later...
(any future totes I plan on making out of a solid colored canvass with cheaper, thinner printed fabric for bottom and lining)
As for the 'zig-zagish' stitch, I overlock everything out of habit. I have a serger and I use it regularly - but none of the other tutorials bothered even zigzagging, all of the seams are covered anyway - just an extra unnecessary step because I just can't stand threads everywhere and my fabric was extra fray'ey' because the pattern was woven in not just printed on.
blah blah blah listen to me go! I really hope you make one, and I want to see it if you do! The links to the other tutorials are probably a lot clearer!
Cute bag!!!
Post a Comment